Cutscene Editing and Creation
This page will run through editing and creating your own cutscenes in Pikmin 2.
Cutscenes use the JStudio library, which was used in Wind Waker, Twilight Princess, Pikmin 2, and Skyward Sword.
In Pikmin 2, cutscenes are contained in demo.szs files in user/Mukki/movie.
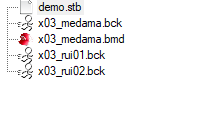
Inside these szs files are a few assets, most notably the JStudio Binary (STB) file. This file controls initialization of cutscene data, as well as camera instructions.
We can use a program called STB2JSON to convert this to a more readable format.
Note when extracting cutscene archives, you must use a program like WiiExplorer that can preserve the file indexes. This is because stb files load assets based in index, not by filename.
STB Basics
STB files are separated into different "blocks" that can represent different "objects". The available blocks in the format are:
- JFVB (function value block)
- JCMR (camera)
- JABL (ambient light)
- JACT (actor)
- JSND (sound)
- JLIT (light)
- JCNT (control)
- JMSG (message)
- JFOG (fog)
- JPTC (particle)
Pikmin 2 only uses JFVB, JCMR, JCNT, JACT, JMSG, and JSND (which are the blocks that are going to be covered here), though the other blocks are theoretically supported. (note STB2JSON only supports the blocks vanilla uses) Particles are instead actors with a special identifier (an @ symbol in front of the name of the actor)
An object has both properties and variables, which control various things about that object.
Objects also have different "commands" to affect variables and properties of an object.
The "VAR" command binds a value or function to a variable.
- Its syntax is:
"VAR (VarName) (Value/function) (Data)"
- The value/function types are:
- Void, to write a 0 to the variable
- Immediate, to write a direct value to the variable (specified in
(Data)) - Time, to write a direct value, that is multiplied by the number of frames since the last "WAIT" command multiplied by 0.03333333, to the variable (specified in
(Data)) - Index, to attach a JFVB function to the variable (the function index is specified in
(Data)).
- A variable can affect more than one value of the bound object, in this case, the
(Data)field will have more than 1 value.
The "SET" command directly affects the properties of the bound object.
- How you set a property is dependent on what the property is (hence they don't have a specific way of being set, unlike variables.)
The "WAIT" command halts the execution of the object for a certain amount of frames.
- After the delay of a "WAIT" command has passed, ALL value/functions will be unbound from the variables.
The "SYNC" command halts the execution of the object until an event, external to the STB, is fired.
The "OFLG", "XFLG" and "AFLG" commands (respectively) OR/XOR/AND the stb flags with a value.
An object's name is defined by the "Type" field.
The JFVB block is the only one that does not represent objects. Instead, it holds "functions" all that represent data and how it evolves over time. There are two main types of functions used in Pikmin 2: "Constant", which contains a value that never changes, and "Hermite", which contains a value that changes following Hermite interpolation. There is also "List-Parameter", which contains a value that changes based on either spline or linear interpolation. This is where values such as animation translation data and camera coordinates are stored.
A group of values typically looks like this:
{
				"Func": "Hermite",
				"Range": "0.0 12.966666",
				"Data": [
                    [
						"0.0",
						"70.229546",
						"0.0",
                    [
						"12.966666",
						"188.07487",
						"0.0",
					],
				]
			},
The range is typically the start and end frames of the movement, if the value is not a constant value. To convert between the time values in range and frames, divide the frame number by 0.03333333.
in this example, 12.966666 becomes roughly frame 389. To convert frames to time, multiply by 0.03333333.
In the Data field there will be subgroups of values with two floats, the first float being the time and the second being the value of whatever you're putting (camera coordinates, animation translation data, etc).
In a List_Parameter function, there will be another group under "Range", that will detail the type of interpolation used in the function, either "Linerar" or "BSPline".
"Range": "0.0 0.666667",
"Interpolation": "BSPLine",
In a Hermite function, each subgroup of values instead has three floats. The first one is time, the second is the value of whatever you're putting , and the third is the tangent value for the hermite interpolation. Setting tangent values to 0.0 will result in a smooth ease.
demos.txt notes
Before getting into major cutscene editing, there are a few things to note in user/Mukki/movie/demos.txt, the file that controls cutscene configs.
Position flags, skip flags, and draw flags are contained here.
A position flag of 2 will use the origin and camera angle specified in demos.txt (both value are confusingly named origin in the file, but the origin is the one with three floats and the angle is the one with one float)
A position flag of 4 or 8 will use the origin and camera angle specified in the code that plays the specific cutscene. (8 specifically will also try to get the best camera angle for the cutscene when played)
A position flag of 16 will do the same as 4 & 8, in addition to taking into account the sound position of certain objects in the cutscene (specified in code)
Draw flags are the left number on pause/draw/fade.
A draw flag of 1 will make pikmin visible.
A draw flag of 2 will make enemies visible.
A draw flag of 4 will make pellets visible.
A draw flag of 8 will make navis visible.
These flags can be combined; for example, to draw all of them would be 15.
Fade flags are the right number on pause/draw/fade.
A fade flag of 3 will have a smooth fade to black open the cutscene.
A fade flag of 6 will have a sharp cut open the cutscene.
Skip flags are labeled with just "flag"
0=start skips, 1=any button skips, 2=unskippable.
Camera
Note when getting camera coordinates, the position coordinates and target coordinates will be relative to the origin of the cutscene's location (wherever it is activated). The origin of a cutscene is specified in user/Mukki/movie/demos.txt, and that value will need to be accounted for when getting coordinate values.
For this example, we will be using a cutscene (x01_gamestart) with an origin of 0.0, 0.0, 0.0, and we will use the pikmin 2 gen editor to get coordinates, where values will be relative to 0.0, 0.0, 0.0 of the map's origin (which will serve as our cutscene origin, as the position flag is set to 2). (You can also use blender to get coordinates, which is especially helpful when using a custom map. This tutorial will use the gen editor, but Blender steps will be detailed later below.)
Let's start making our stb. It's a good idea to start by getting a vanilla stb, and converting it to json, then editing our own values in.
First, we're just doing camera, so delete everything aside from the JFVB and JCMR blocks.
To setup our camera block, input this information:
"JCMR": {
		"Type": "camera",
		"Commands": [
			"VAR ProjFovy Index 0",
			"VAR ViewRoll Index 1",
			"VAR ViewPos Index 2 3 4",
			"VAR TargPos Index 5 6 7",
			"VAR Distance Immediate 1.0 12800.0",
			"WAIT 565",
		]
	},
Setting the Type to "camera" will set the camera.
Camera variables are:
- ProjFovy - the field of view (FOV) of the camera. (float)
- ViewRoll - the rotation of the camera. (float)
- ViewPos - the XYZ position of the camera in the world. (float)
- TargPos - the XYZ position of where the camera is looking in the world. (float)
- Distance - the culling distance of the camera. It is usually set to
1.0 12800.0(near distance, far distance) (float)
The indexes here correspond to values in the function value block. For instance, TargPos index 7 will have the Z coordinate of where the camera is looking take the values from the eighth group in the JFVB block.
The index counts from 0.
Let's start setting some values. Our first value (ProjFovy) will be the FOV of our camera. We want to keep it a constant value, so well have our first FVB group look like this:
{ (this is the bracket for the start of our JSON)
	"JFVB": { (this is the bracket for the start of the JFVB block)
		"Values": [ (this is the bracket for the start of all data values in the block)
			{
				"Func": "Constant",
				"Data": "45.0",
			},
Our next group will be rotation values. As before, we want to keep this constant.
{
				"Func": "Constant",
				"Data": "0.0",
			},
Our JSON should now look like this:
{
	"JFVB": {
		"Values": [
			{
				"Func": "Constant",
				"Data": "0.0",
			},
			{
				"Func": "Constant",
				"Data": "0.0",
			},
		]
	},
	"JCMR": {
		"Type": "camera",
		"Commands": [
			"VAR ProjFovy Index 0",
			"VAR ViewRoll Index 1",
			"VAR ViewPos Index 2 3 4",
			"VAR TargPos Index 5 6 7",
			"VAR Distance Immediate 1.0 12800.0",
			"WAIT 565",
		]
	},


}
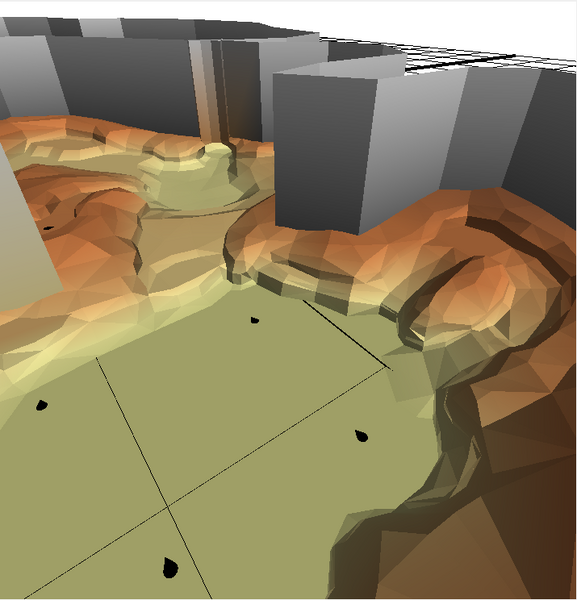
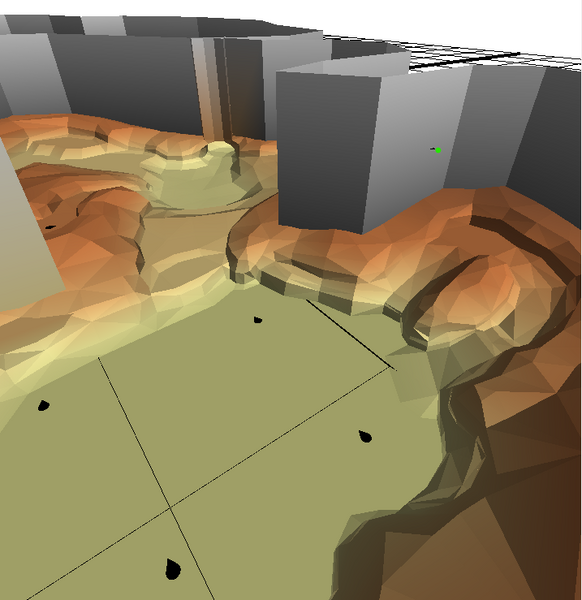
Now it's time to get position coordinates from the gen editor. Open up the files for the valley of Repose, as that is the location of where our cutscene is.
Place a reference object for the first set of coordinates.
Copy the XYZ coordinates of the object into the JSON. They should be in the third (X), fourth (Y), and fifth (Z) set of values as Hermite functions.
The first time value should be 0.0, for the start of the cutscene. Make sure the range is from frames 0 to 565 (converted to time).
{
				"Func": "Hermite",
				"Range": "0.0 18.83333145",
				"Data": [
                    [
						"0.0",
						"414.939424",
						"0.0",
					],
				]
			},
			{
				"Func": "Hermite",
				"Range": "0.0 18.83333145",
				"Data": [
                    [
						"0.0",
						"313.322154",
						"0.0",
					],
				]
			},
			{
				"Func": "Hermite",
				"Range": "0.0 18.83333145",
				"Data": [
                    [
						"0.0",
						"2703.901104",
						"0.0",
					],
				]
			},
Place a reference object for the second set of coordinates.
Copy the XYZ coordinates of the second object into the JSON as the second set in the value groups. The time value should be 18.83333145 (frame 565), for the end of the cutscene.
{
				"Func": "Hermite",
				"Range": "0.0 18.83333145",
				"Data": [
                    [
						"0.0",
						"414.939424",
						"0.0",
					],
                    [
						"18.83333145",
						"-524.69691",
						"0.0",
					],
				]
			},
			{
				"Func": "Hermite",
				"Range": "0.0 18.83333145",
				"Data": [
                    [
						"0.0",
						"313.322154",
						"0.0",
					],
                    [
						"18.83333145",
						"416.293478",
						"0.0",
					],
				]
			},
			{
				"Func": "Hermite",
				"Range": "0.0 18.83333145",
				"Data": [
                    [
						"0.0",
						"2703.901104",
						"0.0",
					],
                    [
						"18.83333145",
						"2444.029785",
						"0.0",
					],
				]
			},
Now for the target coordinates. It helps to move your position in the gen editor to one of your position reference objects, to get a betteer view of where you want your camera to look.
Place a reference object for your target coordinates.
We'll use a Constant function for the target, since we currently do not want where the camera is looking to change.
Copy the XYZ coordinates of the object into the JSON. They should be in the sixth (X), seventh (Y), and eighth (Z) set of values.
{
				"Func": "Constant",
				"Data": "-308.449492",
			},
			{
				"Func": "Constant",
				"Data": "79.412207",
			},
			{
				"Func": "Constant",
				"Data": "3268.020343",
			},
		](this is the bracket for the end of all data values in the block)
	},(this is the bracket for the end of the JFVB block)
This is what your JSON should look like now:
{
	"JFVB": {
		"Values": [
			{
				"Func": "Constant",
				"Data": "45.0",
			},
			{
				"Func": "Constant",
				"Data": "0.0",
			},
			{
				"Func": "Hermite",
				"Range": "0.0 18.83333145",
				"Data": [
                    [
						"0.0",
						"414.939424",
						"0.0",
					],
                    [
						"18.83333145",
						"-524.69691",
						"0.0",
					],
				]
			},
			{
				"Func": "Hermite",
				"Range": "0.0 18.83333145",
				"Data": [
                    [
						"0.0",
						"313.322154",
						"0.0",
					],
                    [
						"18.83333145",
						"416.293478",
						"0.0",
					],
				]
			},
			{
				"Func": "Hermite",
				"Range": "0.0 18.83333145",
				"Data": [
                    [
						"0.0",
						"2703.901104",
						"0.0",
					],
                    [
						"18.83333145",
						"2444.029785",
						"0.0",
					],
				]
			},
			{
				"Func": "Constant",
				"Data": "-308.449492",
			},
			{
				"Func": "Constant",
				"Data": "79.412207",
			},
			{
				"Func": "Constant",
				"Data": "3268.020343",
			},
		]
	},
	"JCMR": {
		"Type": "camera",
		"Commands": [
			"VAR ProjFovy Index 0",
			"VAR ViewRoll Index 1",
			"VAR ViewPos Index 2 3 4",
			"VAR TargPos Index 5 6 7",
			"VAR Distance Immediate 1.0 12800.0",
			"WAIT 565",
		]
	},
}
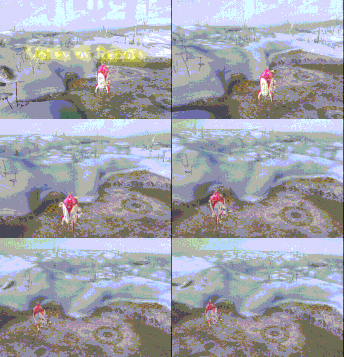
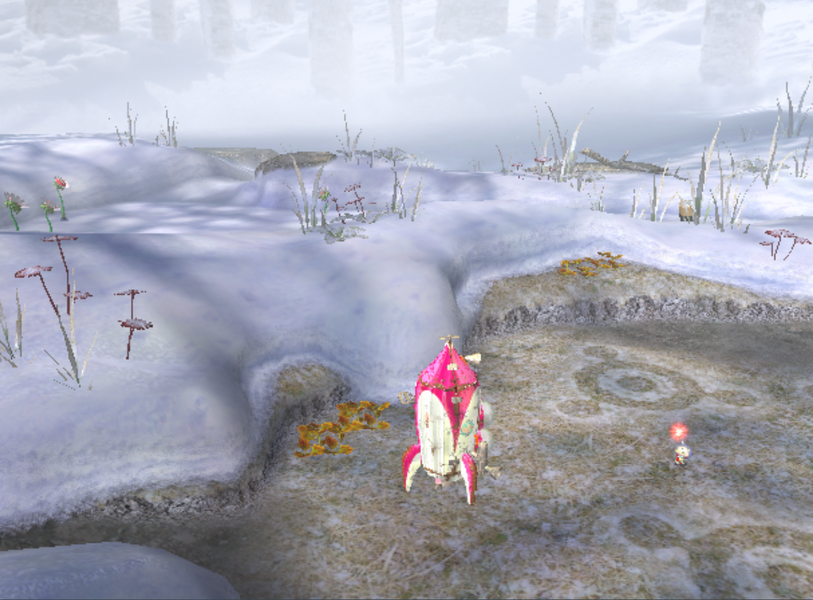
Now you can save your JSON, use STB2JSON to convert it to STB, then repack the cutscene archive. If everything was done correctly, it should look like this ingame:
If using Blender for coordinates, assuming your map is centered correctly, you can use the coordinates of Blender's camera for the cutscene coordinates.
To convert between Blender coords and game coords, the X value remains the same, the Z coordinate in blender will be the Y coordinate in game, and the Y coordinate in blender should be multiplied by -1.
Location XYZ will be ViewPos, and Rotation XYZ will be TargPos.
Actors (and particles)
Actors are the most complicated part of cutscenes, so we'll need to break a few things down.
There are four main types of actors:
Game Actors, which are certain creatures in the game world (like navis and onions). These are denoted with a * symbol in front of the actor's name.
Special Actors, which are actors that can activate certain special functions in game. These are denoted with a + symbol in front of the actor's name.
Particle Actors, which are particles. These are denoted with a @ symbol in front of the actor's name.
Actors, which are regular models placed in a cutscene. These are denoted with a p symbol in front of the actor's name, though this doesn't seem to be required.
Sound effects are not part of the JACT block, but behave similarly to actors. These are denoted with a # symbol in front of the actor's name.
Game Actors
For Game Actors, each one has an identifier:
"theOrima"is Olimar."theLouie"is Louie/President."orimaAlive_1"is the first alive leader."orimaAlive_2"is the second alive leader."orimaDead_1"is the first dead leader."orimaDead_2"is the second dead leader."onyon_R"is the Red Onion."onyon_Y"is the Yellow Onion."onyon_B"is the Blue Onion."ufo"is the Hocotate Ship."pod"is the Research Pod."pikmin"is the target of the cutscene, if that target is a Pikmin."orima"or "player" is the current active player."target" is the target of the cutscene.
Game Actor variables are:
- Translation - the XYZ actor position offset from the movie position. (float)
- Rotation - the XYZ rotation of the actor relative to the actor's default orientation. Only the Y value seems to be used (float)
Game Actor properties are:
- AnimData
- Anim
- MovieTranslation
AnimData sets the index of the BCK data in the cutscene archive that will be applied to the creature it's set to affect. (int) Anim sets which animation will be used. Setting Anim to "BCK" will use the BCK, while setting it to "None" will use the creature's base animation archive. (string)
Here's an example from the unused red onion boot cutscene (g02_boot_onyonR):
"JACT": {
		"Type": "*onyon_R",
		"Commands": [
			"SET MovieTranslation None",
			"SET Anim None",
			"SET AnimData 4",
Here, Anim is set to None, so the animation will instead come from the onion's animations, and AnimData being set to 4 (counting from 0) will have the onion perform the fifth animation in the onion's animmgr.txt, which is bootup.bck.
MovieTranslation defines how translation will be applied to the actor (string):
- "None" wont do anything,
- "Direct" will directly copy the translation to the actor position,
- "MinY" will directly copy the X and Z translations to the actor position, but set the Y position to the map's minimum Y,
- "FaceDir" will directly copy the translation to the actor position and copy the Y value of the Rotation variable to the direction the actor is facing,
- "MoviePos" will copy the movie position to the actor position.
Example (from x03_find_red_onyon)
"JACT": {
		"Type": "*theLouie",
		"Commands": [
			"VAR Translation Index 16 17 18",
			"SET MovieTranslation Direct",
			"SET Anim BCK",
			"SET AnimData 3",
			"WAIT 70",
			"VAR Translation Index 19 20 21",
			"SET MovieTranslation Direct",
			"SET Anim BCK",
			"SET AnimData 4",
			"WAIT 350",
		]
	},
Here, our actor is *theLouie (Louie), the first set of translation (in this case, movement of Louie's model) coordinates come from the value groups at indexes 16, 17, 18 (counting from 0) in the FVB block, the animation is set to pull from the cutscene archive, and it sets the fourth (0, 1, 2, 3) file in the archive as the animation.
After waiting 70 frames (and after the textbox is cleared) the second set of translation coordinates come from the value groups at indexes 19, 20, 21 in the FVB block, the animation is set to pull from the cutscene archive, and it sets the fifth (0, 1, 2, 3, 4) file in the archive as the animation.
Translation coordinates can be obtained the same way as obtaining camera position coordinates.
Onions (including the ship and pod), navis, underground cave holes, and geysers also have their own special properties that can be set. When these properties are set, special functions specific to that creature that can be executed.
(note: the format for these identifiers is hex value/JSON name)
Onions
- 0x64/CreateHead1 - create sprout
- 0x65/Spot - starts onion/ship/pod spot effect
- 0x66/SpotState - stops onion/ship/pod spot effect
- 0x67/StartPropera - start ship propeller animation
- 0x68/StopPropera - stop ship propeller animation
- 0x69/CreateHead2 - create sprout
Navi
- 0x64/EnterPikis - make Pikmin go into the onion/ship
- 0x66/HoleInPikis - make Pikmin go into a cave hole
- 0x67/FountainPikis - make Pikmin jump onto a geyser
- 0x68/DelShadow - hide leader shadow
- 0x69/DelParticles - hide leader particles
- 0x6a/AddParticles - show leader particles
- 0x6b/AddShadow - show leader shadow
Hole
- 0x64 - make hole appear
Geyser
- 0x64 - make geyser appear
Example (from x03_find_red_onyon)
"JACT": {
		"Type": "*onyon_R",
		"Commands": [
			"WAIT 105",
			"SET CreateHead2",
			"WAIT 315",
		]
	},
Particle Actors
Particle Actors are particles, getting their data from the efx.jpc included in the cutscene archive.
Particle actors have two properties:
- Parc - the particle ID (Short) and the particle list index (Byte) in the JPC.
- Targ - the object on which the particle will appear. If a second string is specified, the particle will appear on the object's model joint specified by the second string
Example:
"JACT": {
		"Type": "@boot_gr_b",
		"Commands": [
			"SET Parc 5 5",
			"SET Targ *onyon_R",
			"WAIT 390",
		]
	},
	"JACT": {
		"Type": "@boot_gr_o",
		"Commands": [
			"SET Parc 6 5",
			"SET Targ *onyon_R body_1",
			"WAIT 390",
		]
	},
Particles have three variables:
- Translation - XYZ position offset from the position of the object it is attached to, or the cutscene position if not attached to an object.(float)
- Rotation - XYZ rotation relative to the particle's default orientation(float)
- Scaling - XYZ size relative to the particle's default size(float)
If "ground" is the second string, the particle will uses the object position and ignore the object matrix.
To kill a particle, set the Targ property again with the first string being "*kill".
Special Actors
Special Actors are actors whose can affect parts of the game. When a specific property of the special actor is set, the game will execute special functions depending on the property. They are usually context sensitive.
The properties are:
- 0x00/LeaveCave - abandon treasures and pikmin when giving up
- 0x01/DayEnd - create day end enemies, spawn left behind Pikmin
- 0x02/FallPikiSound - start falling Pikmin sound effects in cave entry
- 0x03/ForceEnterPiki - force Pikmin into the Onion on day 1
- 0x65/StartDemoCamera - start "demo" camera type (using the regular game camera instead of the cutscene camera)
- 0x66/EndDemoCamera - go back to normal player camera
- 0xC9/OpenKentei - open treasure collection UI (res_kantei)
- 0xCB/OpenKentei - open special item collection UI (res_special_item)
- 0x12D/FadeOut - fade the screen
- 0x12E/FadeIn - unfade the screen
Example:
"JACT": {
		"Type": "+MovieCommand",
		"Commands": [
			"SET FallPikiSound",
			"WAIT 219",
		]
	},
Actors
Actors are regular models that can appear in a cutscene.
Actor properties are:
- BCKIdx - sets the index of the BCK data in the cutscene archive that will be applied to the actor it's set to affect. (int)
- BMDIdx - sets the index of the BMD model the actor will use. (int)
Actor variables are
- Translation - the XYZ actor position offset from the movie position. (float)
- Scaling - the XYZ actor size relative to its default model size. (float)
- Rotation - the XYZ actor rotation relative to its default orientation. (float)
Now that we've absorbed all that, let's add some actors to our cutscene.
We're going to add Olimar, and have him play the down animation from s03_orimadown. We'll keep him stationary.
"JACT": {
		"Type": "*theOrima",
		"Commands": [
			"SET MovieTranslation None",
			"SET Anim BCK",
			"SET AnimData 1",
			"WAIT 565",
		]
	},
Note: because we don't have any translation going on here, olimar will be spawned where he would be spawned in regular gameplay.
Sounds and messages
Message blocks are usually paired with a control block, presumably to halt things until the text box is done.
"JMSG": {
        "Type": "メッセージ",
        "Commands": [
            "WAIT 88",
            "SET Code 894 0",
            "WAIT 1",
        ]
    },
    "JCNT": {
        "Type": "コントロール",
        "Commands": [
            "WAIT 89",
            "SYNC 1",
            "WAIT 1",
        ]
    },
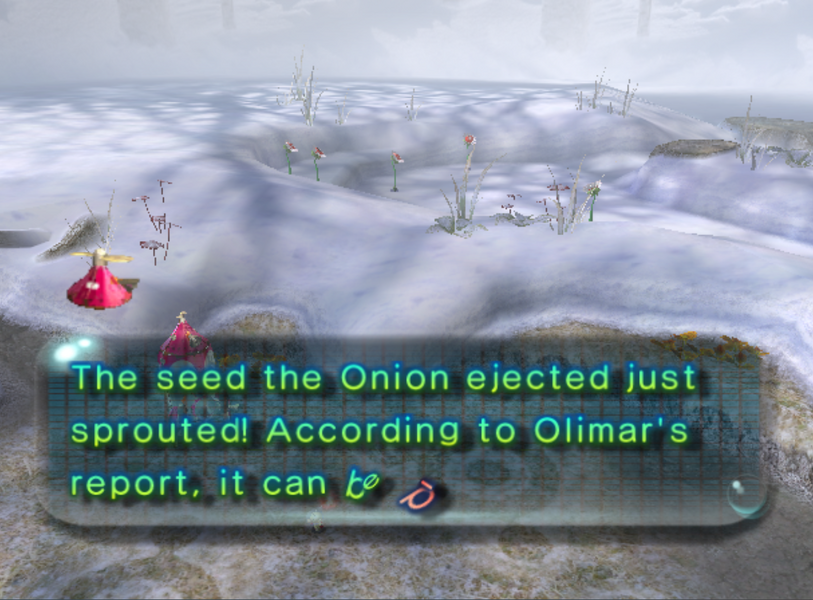
The Type for messages is always "メッセージ" ("message"), and the Type for control is always "コントロール" ("control"). If there is more than one message/control in a cutscene, a number will follow the text (e.g. "メッセージ2" for the second message). Note that these aren't required, and currently, replacing the japanese text with english is needed for the rebuilding to not make a malformed STB. Note the Code being set for the message block. The first three digits (short) are the message index (in decimal) in the BMG. The last digit (short) is the sub index of the message.
Sounds have two major components: Music, which is handled outside the STB, and sound effects, which for the most part are handled inside the STB.
It's still worth mentioning some things about music:
Which AST that is associated with which cutscene is controlled by PSM::Demo::initiate (in utilityU/PSMainSide_Demo.cpp) in the game's code. The function checks for a cutscene's name, then associates a stream file ID with it.
In vanilla, two cutscenes (x20_blackman and x03_find_red_onyon) are coded not to start with music initially. For the latter cutscene, audio is coded to start after the first text box has been closed.
Now about the other part of cutscene audio: Sound effects.
This is what a typical sound block looks like:
"JSND": {
        "Type": "#orimaAlive_2_1",
        "Commands": [
            "WAIT 335",
            "SET Parent *orimaAlive_2",
            "SET ParentNode happajnt3",
            "SET ParentEnable True",
            "SET Located True",
            "SET ID 2161",
            "SET BeginFadeIn 0.0",
            "WAIT 12",
        ]
    },
As stated earlier, a # in front of the name of the actor denotes a sound.
Sound's properties are:
- Parent - binds the sound to an actor (in this case, the second alive player, or Louie) (string)
- ParentNode - further binds the sound to a specific joint on the model of the actor (string)
- ParentEnable - sets this binding to true. (boolean)
- Located - tells the sound to follow a position, whether from an attached creature or a direct position variable. (boolean)
- ID - the sound effect ID, in decimal. See this page for IDs. (int)
- Begin - starts the sound.
- BeginFadeIn - tells the sound to fade in when started, with the time it takes to fade in determined by the float after it.
- End - stops the sound.
- EndFadeOut - tells the sound to fade out when started, with the time it takes to fade out determined by the float after it.
Sound's variables are:
- Volume (float)
- Pan (float)
- Pitch (float)
- TempoProportion (float) - speed
- Fxmix (float) - reverb/echo
- Position (float) - XYZ sound position offset from the movie position
Let's add a sound effect and a text box to our cutscene.
Text box first, we'll use message index 915 (in the BMG, this will show as hex, so it's actually 0x393) and have it appear at the end of the cutscene.
"JMSG": {
		"Type": "message",
		"Commands": [
			"WAIT 564",
			"SET Code 915 0",
			"WAIT 1",
		]
	},
	"JCNT": {
		"Type": "control",
		"Commands": [
			"WAIT 565",
			"SYNC 1",
			"WAIT 1",
		]
	},
Due to a seemingly hardware dependent bug, the stb created by STB2JSON may have the "control block" represented as 0xEFBFBDEFBFBDEFBFBDEFBFBD instead of 0xFFFFFFFF, which is the correct one. If this happens, open your stb in a hex editor and change the offending bytes, making sure to delete the extra bytes.
Now let's test in game.
Finally, let's add a sound. Let's play PSSE_SY_WMAP_MONEY_UP (one of the ka-ching sounds)
We're not going to tie it to any actor, just have it play on its own.
"JSND": {
		"Type": "#bling",
		"Commands": [
			"WAIT 194",
			"VAR Position Immediate 0.0 0.0 0.0",
			"SET Located True",
			"SET ID 6205",
			"SET BeginFadeIn 0.0",
			"WAIT 371",
		]
	},
Our whole JSON should now look like this:
{
	"JFVB": {
		"Values": [
			{
				"Func": "Constant",
				"Data": "45.0",
			},
			{
				"Func": "Constant",
				"Data": "0.0",
			},
			{
				"Func": "Hermite",
				"Range": "0.0 18.83333145",
				"Data": [
                    [
						"0.0",
						"414.939424",
						"0.0",
					],
                    [
						"18.83333145",
						"-524.69691",
						"0.0",
					],
				]
			},
			{
				"Func": "Hermite",
				"Range": "0.0 18.83333145",
				"Data": [
                    [
						"0.0",
						"313.322154",
						"0.0",
					],
                    [
						"18.83333145",
						"416.293478",
						"0.0",
					],
				]
			},
			{
				"Func": "Hermite",
				"Range": "0.0 18.83333145",
				"Data": [
                    [
						"0.0",
						"2703.901104",
						"0.0",
					],
                    [
						"18.83333145",
						"2444.029785",
						"0.0",
					],
				]
			},
			{
				"Func": "Constant",
				"Data": "-308.449492",
			},
			{
				"Func": "Constant",
				"Data": "79.412207",
			},
			{
				"Func": "Constant",
				"Data": "3268.020343",
			},
		]
	},
	"JCMR": {
		"Type": "camera",
		"Commands": [
			"VAR ProjFovy Index 0",
			"VAR ViewRoll Index 1",
			"VAR ViewPos Index 2 3 4",
			"VAR TargPos Index 5 6 7",
			"VAR Distance Immediate 1.0 12800.0",
			"WAIT 565",
		]
	},
	"JACT": {
		"Type": "*theOrima",
		"Commands": [
			"SET MovieTranslation None",
			"SET Anim BCK",
			"SET AnimData 1",
			"WAIT 565",
		]
	},
	"JMSG": {
		"Type": "message",
		"Commands": [
			"WAIT 564",
			"SET Code 915 0",
			"WAIT 1",
		]
	},
	"JCNT": {
		"Type": "control",
		"Commands": [
			"WAIT 565",
			"SYNC 1",
			"WAIT 1",
		]
	},
	"JSND": {
		"Type": "#bling",
		"Commands": [
			"WAIT 194",
			"VAR Position Immediate 0.0 0.0 0.0",
			"SET Located True",
			"SET ID 6205",
			"SET BeginFadeIn 0.0",
			"WAIT 371",
		]
	},
}
Convert your JSON to STB, remember to fix the control block if needed, repack your archive with WiiExplorer (make sure the file IDs are correct!), and play the cutscene in game.
Congratulations, you have now made a full cutscene! Feel free to experiment with editing vanilla cutscenes, or making more of your own.
